I am using a Behringer X32 digital mixing desk both when mixing other bands and mixing my own band while performing at the same time on stage. In the latter case I always struggle to turn the vocal reverb on and off in time when a song starts or ends. When I was using an analog mixing console, I had the option to attach a footswitch to toggle this effect on and off. On the X32 this is not possible but it is possible to remote control the desk via MIDI commands. So I decided to build a footswitch controller that will send MIDI commands to the X32.
The controller is based on a cheap Arduino Nano board that can be ordered on Ebay for around 3 Euro. All parts can be bought for less than 10 Euro in total. Here is a complete list of all necessary parts (assuming that you want to connect an existing footswitch):
- Arduino Nano
- 5-pin DIN jack
- 6.3mm Instrument cable jack
- LED in your color of choice
- 2 220 Ohm resistors
- Some wires
- small case
Wiring is pretty easy. Here is a complete view of the breadboard layout:
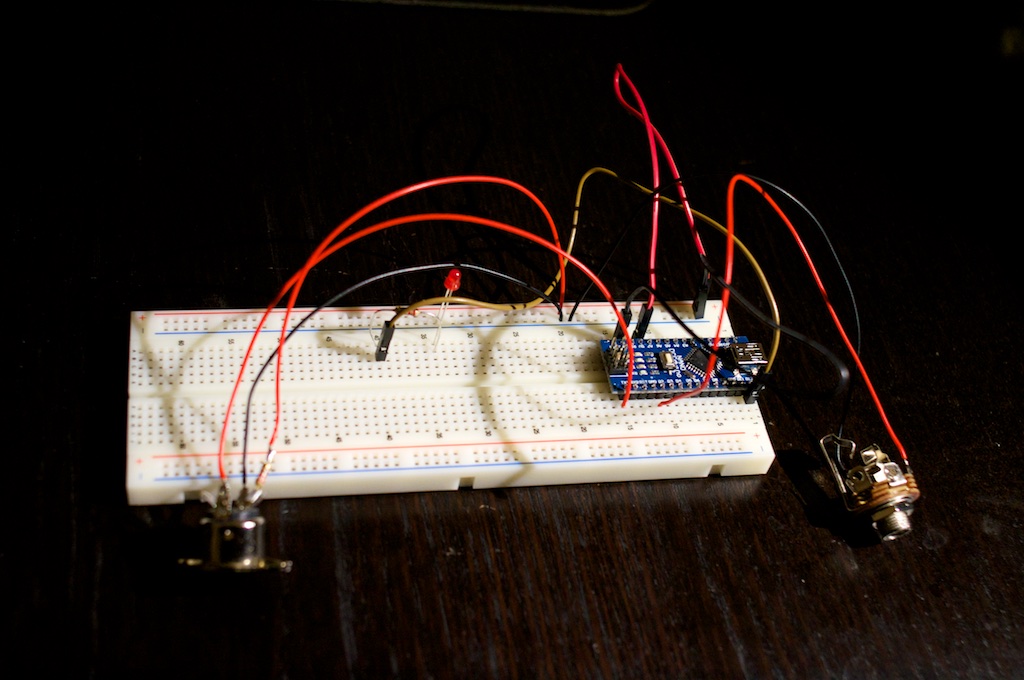
To connect the footswitch, wire the tip of the 6.3mm jack to pin D2 on the Arduino. Connect the ring to pin GND.
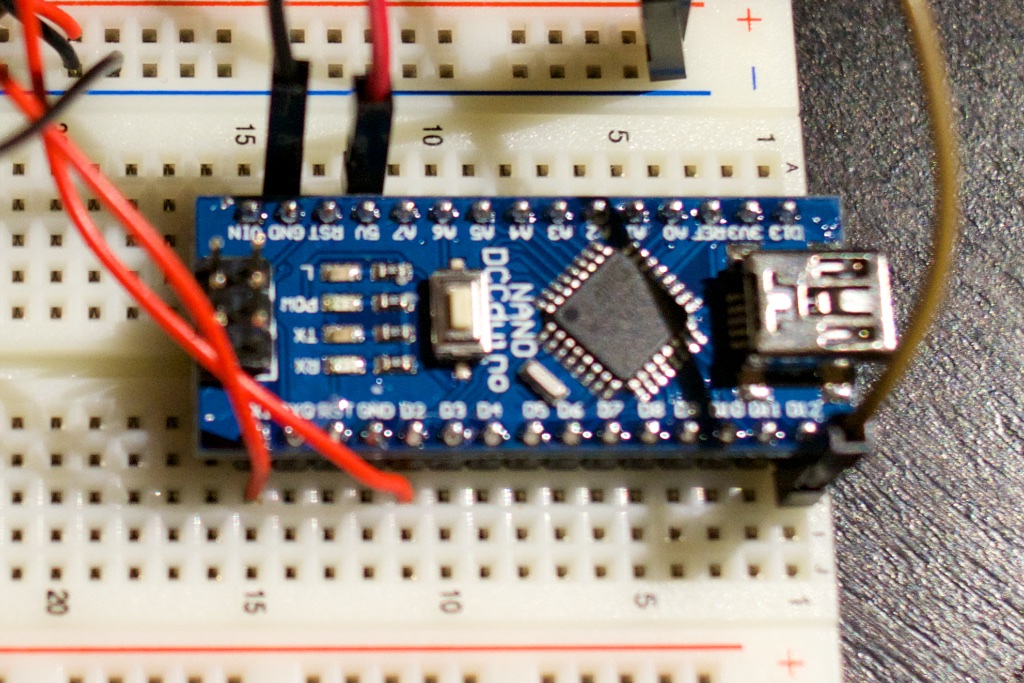
Connecting the MIDI jack is done by soldering a 220 Ohm resistor to pin 4 and then connecting the other pin of the resistor to pin 5V on the Arduino. Pin 2 on the jack needs to be connected to GND and pin 5 to TX1. Here is a picture of the wiring on the MIDI jack:

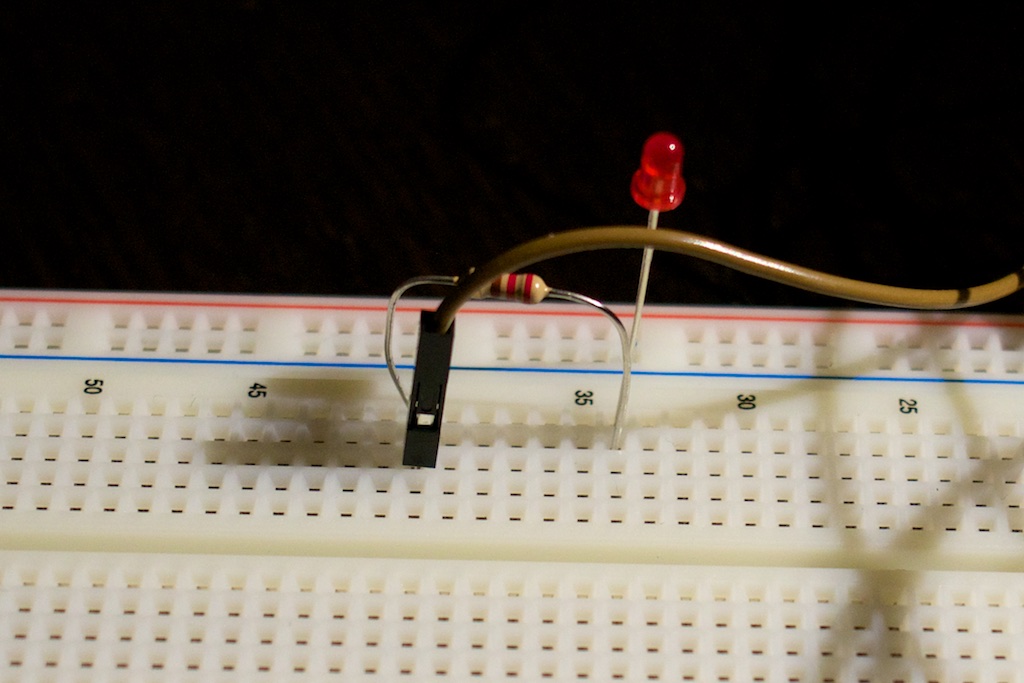
The LED is optional but I wanted a visual indicator when I have mute enganged on the X32. Solder a 220 Ohm resistor to the longer pin of the LED and connect it to D12 on the Arduino. Now connect the other pin of the LED to GND. Here is the wiring on the breadboard:
Finally a view of all pins used on the Arduino:
The hardware part is now complete. All you need to do is upload the following program to the Arduino board:
// pin to use for indicator LED
int ledPin = 12;
// pin that is connected to the footswitch
int buttonPin = 2;

int buttonState = 0;
int buttonLastState = 0;
int buttonInitState = 0;

int muteStatus = 0;

void setup() {
  pinMode(ledPin, OUTPUT);
  pinMode(buttonPin, INPUT_PULLUP);

  // Setup serial port for MIDI communication
  Serial.begin(31250);

  // read current button state, a press is detected whenever
  // state changes to anything else than the init state
  buttonInitState = digitalRead(buttonPin);
  // we only want to do something on state changes
  buttonLastState = buttonInitState;
}

void loop() {
  buttonState = digitalRead(buttonPin);

  // has the state changed?
  if (buttonState != buttonLastState) {
    buttonLastState = buttonState;
    if (buttonState != buttonInitState) {
      // button is in pressed state, trigger action
      if (muteStatus == 0) {
        // mute and light up LED
        digitalWrite(ledPin, HIGH);
        // send CC 85 on channel 2 with value 0 to mute
        // mute group 6 on a Behringer X32
        midiCc(2, 85, 0);
        muteStatus = 1;
      } else {
        // unmute and turn off LED
        digitalWrite(ledPin, LOW);
        midiCc(2, 85, 127);
        muteStatus = 0;
      }
    }
    // workaround to prevent fluttering of button state
    delay(10);
  }
}

void midiCc(int channel, int command, int value) {
  Serial.write(175 + channel);
  Serial.write(command);
  Serial.write(value);
}
This solution should work with any regular footswitch. Polarity doesn’t matter as the initial state will be detected during startup. I am sending MIDI CC messages to mute and unmute mute group 6 of the X32 in this example, but you can replace that part with any MIDI command you like.
Leave a Reply